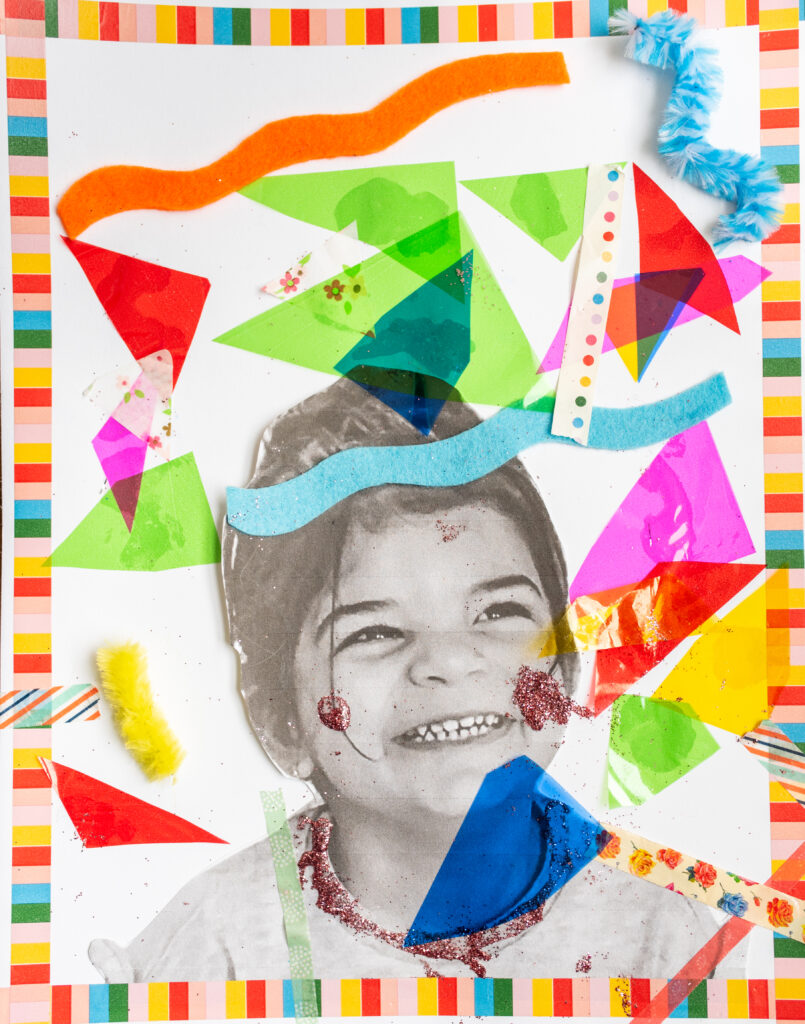
This self-portrait project is a super fun and easy craft for kids to both set up and create, while working on some really important motor skills! We love how this activity involves using a picture of your little one because it makes it that much more personable to them and extra fun. They will be smiling the whole time! We also love this craft because it promotes creativity and fine motor skills (think cutting, gluing, pasting), and you can do so much more along the way! Creativity helps us learn to express and cope with our feelings and brainstorm new ideas and ways to problem solve, in addition to letting your child express themselves.
You will need:
-A printed black and white picture of your little one
-Random paper, stickers, washi tape, etc. We used cellophane, washi tape, pipe cleaners, glitter glue, felt, and recycled wrapping paper.
-Glue stick
-Card stock
-Safety Scissors
Steps and Modifications: since kids are often at different steps of developmental readiness for these kinds of projects, here are some ways you can modify the activity and instructions to meet your child where they are at!
Step 1 – Cutting out the photo
For a beginner scissor user, you can help your child cut out the photo by taking turns, or just asking them to do the first snip or two. You can also use a thick sharpie to draw a very obvious line around the photo to show them where to cut – you can do this with straight lines (e.g., cutting a square or triangle around the photo), or use curvy or zig zag lines to cut out the photo in fun and interesting shapes! If you child is ok with physical assistance, you can provide some light hand over hand support. We’re also big fans of simple verbal instructions, like, “Close”, and “Open!” to help your child know what to do next. For scissor experts, they can cut out the photo themselves!
Step 2 – Glue it to the card stock
We like to use purple glue sticks that go on purple but dry clear to help your child see where they are gluing. You could also use a pencil to draw circles or lines for your child to trace with the glue stick if they need an extra cue. This is also a great time to talk about what the glue does (We’re going to stick it on!). If your child is a messy glue user, no problem! Use this as an opportunity to talk about the tactile and sensory experiences (e.g., “Wow, it’s so sticky!” Or “Oooh, that feels funny”) or body parts (“Oh no, it’s on your finger!!”).
Step 3 – Introduce all the craft supplies you have set out for them.
Things like assorted paper and materials as well as any glitter, stickers, or washi tape you have set aside. You can also incorporate some of your child’s favourite things by printing out images of favourite characters, adding stickers of things that they like, or even drawing some of them on the page together. Let them explore cutting different shapes, using different textures, and decorating as much as they can imagine. Some other skills you can incorporate into this step:
- You can offer choices (“Mermaid sticker or Happy face sticker?”), that your child can respond to with spoken language, AAC (augmentative alternative communication), or by pointing/gesturing/choosing the item they want.
- You can talk about colours, shapes, and amounts of things (“Look! Three pieces!”, “What a nice blue paper,” “Do you see a square anywhere?”)
- Make your own confetti by pre-cutting thin strips of paper. That way your child can easily snip off little pieces at a time, especially if they are new to using scissors
- Talk about sequencing – using first/next/last language about the steps of the activity you already completed or what you will do next is a great way to work on sequencing events!
- Show someone! When it’s finished, go with your child to find someone else to show the craft to excitedly. This is a great way to build interest in sharing with others!
This will easily be their most favourite work of art when it’s done. Put it somewhere visible (on the fridge, maybe?) and talk about it! Next time you have someone over, you can suggest that your child show them their picture craft to remind them of the fun activity, share it with others, and help them feel proud of their accomplishments.
Are you excited to try this activity? What else might you incorporate into it? How did it go?
